Creating a mailmerged document
This article will show you how to easily create a letter that can be sent to multiple recipients.
Before you start, you will need:
- Microsoft Excel spreadsheet (with your data/recipient list ready)
- Microsoft Word document with your letter
1. Link your address data list
- In Word, go to the Mailings Tab
- Click Select Recipients and then Use an Existing List (This will open Windows Explorer)
- Select the Excel file that contains your data
- Click Open and then OK.
You're now ready to start merging your data on to your letter.
2. Position the address correctly
CAUTION: When mailmerging letters, the length of the address can cause the body of the letter to move up if the address is shorter.
For this reason, we recommend adding a text box to make sure that no other content is captured in the address area after the merge has taken place.
Start with our Postworks friendly template or add a text box to your existing document for positioning the address.
3. Add merge fields
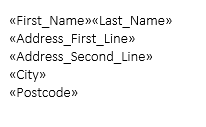
- In the Mailings tab, click the Insert Merge Field drop-down button
- The headers from your spreadsheet will appear in the dropdown menu.

- Choose the Merge Field you wish to insert and click to select.

4. Preview your letters
- Click the Preview Results button to view how your data will actually look on the page and click the blue arrows to view the different rows of data.

- Complete the rest of your document with any other merged fields
5. Complete the merge
- Click the Finish & Merge button
- From the dropdown menu choose Edit Individual Documents
- Click OK to merge all documents
6. Save as a PDF for uploading to Postworks
- Click File > Save As and choose PDF as the file type under the file name field. Click Save.