Need assistance setting up your system? Schedule a call with Postworks Support, and we'll guide you through the process online.
1. Admin rights and installation
- Log in as a user with Administrator rights on your PC.
- Uninstall any previous versions of PostboxServer™. View the Windows support article on uninstalling apps here.
- Download and run the PostboxServer™ installer.
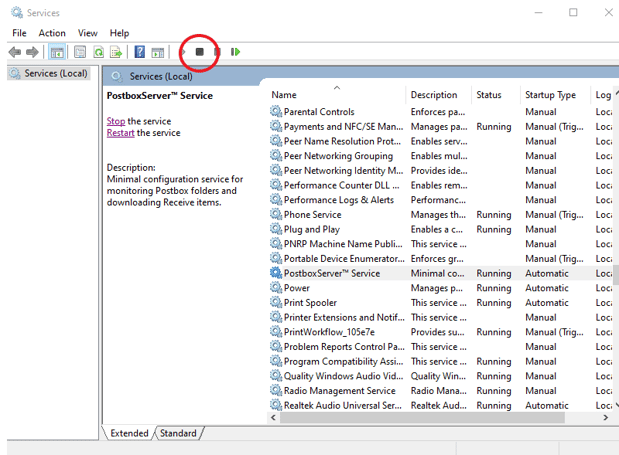
- Ensure that the PostboxServer™ Service is not running on your Windows PC by searching for "Services" in the Windows search bar, locating the PostboxServer™Service, and clicking on the Stop button to disable it.
2. An introduction to mapping the folders for Postworks to monitor
PostboxServer™ uses a monitor.json file to map the folder locations you want us to monitor for new files.
Once these designated locations have been set up, PostboxServer™ will automatically collect any new files that are added and meet our acceptance criteria.
- Open Windows Explorer and go to “C:\Program Files\PostboxServer\”.
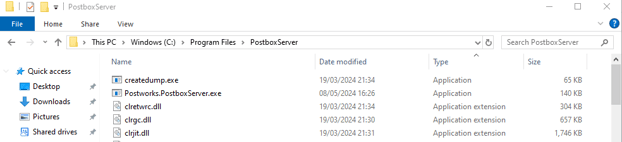
- Double-click the file named monitor.json. You can open this in Notepad (or we suggest Sublime Text)

Folders can be mapped for the following:
- Sending files/letters for posting
- Receiving files/letters that have been received
- Downloading copies of files/letters that have been posted
You do not need to fill out all settings. If you are only using Send services, simply fill out the MonitorSettings section.
- The file will have the following format:
{

  "PostworksAPISettings": {

    "ApiAddress": "API Address should go here. https://demo-api.postworks.co.uk/ for demo and https://api.postworks.co.uk/ for live",

    "ApiKey": "Your API key should go here. Please ask Support for an API Key if you don't know yours."

  },

  "MonitorSettings": {

    "Folders": [

      {

        "FolderFullPath": "This is the path that will be monitored. Any PDF file falling on this folder will be sent to Postworks for posting.",

        "PostboxId": "The postbox ID should go here. Please go to HUB > Edit Postbox > Advanced Settings > Copy Postbox ID and paste it here."

      },

      {

        "FolderFullPath": "There can be multiple folders for monitoring and PDF files falling on each, will be sent to the respective Postbox ID",

        "PostboxId": "The postbox ID should go here. Please go to HUB > Edit Postbox > Advanced Settings > Copy Postbox ID and paste it here."

      }

    ]

  },

  "ReceiveSettings": {

    "IncomingFolder": "This is the path where Receive files will be downloaded to. Only items received in the last 24h are downloaded and older Receive items will be ignored."

  },

  "DownloadSettings": {

    "IncomingFolder": "This is the path where Send files will be downloaded to. Only items received in the last 24h are downloaded and older Send items will be ignored.",

    "FilenameStructure": "This is the filename of the downloaded file. It can be either 'URN' or 'Reference'"

  }

}
CAUTION: Deleting a simple comma from the monitor.json can cause PostboxServer™ not to work so please edit carefully.
4. Editing "PostworksAPI Settings"
The PostworksAPISettings section of the monitor.json holds the "API address" and your "API Key".
- "API Address"
- The "API address" is the URL that tells PostboxServer™ whether to connect to our DEMO or LIVE environments. Paste the URL below exactly as it appears in between the "quotation marks".
-
- For DEMO use: https://demo-api.postworks.co.uk/
- For LIVE use: https://api.postworks.co.uk/

- "API Key"
- The "API key" is specific to your User (not your Account) and can only be obtained by contacting Postworks Support either via email or the online chat function within PostworksHUB and requesting an API key for your user.
- Paste the "API key" below provided by Postworks Support exactly in between the "quotation marks".

5. Editing the "MonitorSettings"
The "MonitorSettings" section contains all folders monitored by PostboxServer™, which can range from 1 to the maximum number of handles per process for your OS. Each folder configuration has 2 properties, the "FolderFullPath" and the "PostboxID".
- "FolderFullPath"
- This is the file path of the folder that you want PostboxServer™ to watch for new files. NOTE: you cannot have sub-folders that require monitoring within folders.
-
- To get the full path of a folder open the folder you want to add files to—Right-click on the address bar. Click copy address.

- Paste the "FolderFullPath" below exactly between the "quotation marks".

-
- When you paste the file path into the monitor.json, single backslashes will separate the folders. These must be changed to double backslashes. i.e. from \ to \\ according to the example below.

The monitored folders can be located on any drive of your choice. It is important to ensure that the selected drive has Modify, Read and Write permissions enabled.
To check this, right-click on the selected drive and click on properties. Click on the security tab and ensure that you have the permissions enabled.
Administrator rights required to make any changes.
- "PostboxID"
- This is the unique ID that we assign to each Postbox or Teambox that has been created. If you haven't already, these will need to be created first.
- To get the "PostboxID" go to PostworksHUB, click to Edit the Postbox, scroll down and click Postbox ID: Copy to clipboard

- Paste the "PostboxID" below provided exactly in between the "quotation marks".

6. Completing the setup of the .json
If your organisation does not have the requirement for the below you can delete the irrelevant lines on the monitor.json:
- Receiving files/letters that have been received
- Downloading copies of files/letters that have been posted
Make sure to close the monitor.json file and save your changes when prompted.
7. Restart the PostboxServer Service
- Restart the PostboxServer™ Service by searching for "Services" in the Windows search bar, locating the PostboxServer™Service, and clicking on the Play button to restart it.

TOP TIP: We recommend putting one file into the monitored folder and waiting up to 5 seconds to check if the file 'disappears'.
A completed and error folder will appear and the file if successful, will be moved to completed, and if not, into error.
Need some help?
We got you!
If you would like, we can check your monitor.json file for you or you can book a call with us to complete the set-up with you online and we'll talk you through it.
Book some time with us by contacting Postworks Support either via email or the online chat function within PostworksHUB.